Layup Area Interface
What You See
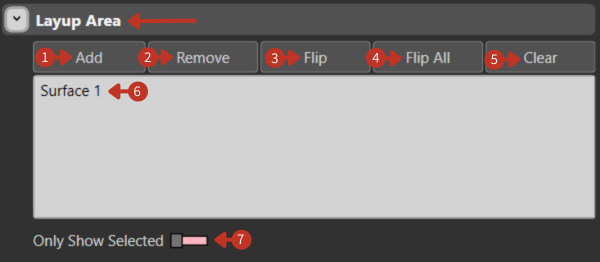
An interface section titled "Layup Area" with several action buttons: "Add," "Remove," "Flip," "Flip All," and "Clear." Below these controls, there's an item listed as "Surface 1," indicating a selectable area within the layup process. Additionally, there's a toggle at the bottom labeled "Only Show Selected."
Layup Area controls for surface selection and management
What It Means
This part of the software interface is dedicated to organizing and managing different areas where materials will be laid up in the manufacturing process.
Control Functions
-
"Add": This button is used to define a new layup area/space.
-
"Remove": Allows the user to delete the selected layup area from the configuration, which in this context, would be "Surface 1" if it is selected.
-
"Flip": This function inverts the selected surface, which could be necessary to adjust for the orientation of material application.
-
"Flip All": Applies the inversion action to all defined layup areas, which is useful for batch adjustments.
-
"Clear": This option clears the layup area list, removing all entries and allowing the user to start defining areas from scratch.
Surface Management
"Surface 1": Represents an existing layup area that can be manipulated with the provided controls.
Visualization Control
"Only Show Selected" Toggle: When activated, this toggle displays only the layup areas that have been selected by the user, helping to focus on specific areas without the distraction of other elements in the workspace.
Working with Layup Areas
- Define multiple surfaces for complex parts
- Use flip functions to correct surface normals
- Isolate specific areas for detailed work
- Clear and rebuild when making major changes