Mold Geometries Interface
What You See
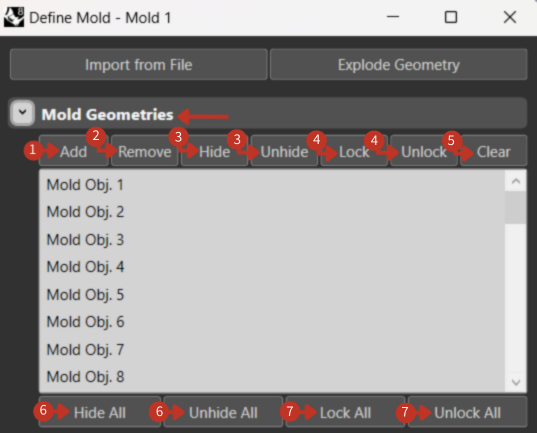
The window, titled "Define Mold - Mold 1," presents a section called "Mold Geometries," featuring a list of mold objects labeled "Mold Obj. 1" through "Mold Obj. 8." Above the list are buttons for "Add," "Remove," "Hide," "Unhide," "Lock," "Unlock," and "Clear," and below the list are additional options for "Hide All," "Unhide All," "Lock All," and "Unlock All."
Mold object management with visibility and locking controls
What It Means
This interface is designed for detailed management of various geometrical components of a mold within a manufacturing or design software system.
Individual Controls
-
"Add": This button is used to introduce a new geometry component to the mold.
-
"Remove": Allows the user to delete a selected geometry component from the mold.
-
"Hide"/"Unhide": These options control the visibility of selected mold components within the software, making it easier to focus on specific parts of the mold.
-
"Lock"/"Unlock": These functions are used to prevent or allow changes to the selected mold geometries, protecting them from accidental modifications or enabling editing.
-
"Clear": Clears the selection or removes all components from the list.
Batch Controls
-
"Hide All"/"Unhide All": These buttons offer a quick way to hide or reveal all mold geometries in the list at once.
-
"Lock All"/"Unlock All": Provide the ability to quickly lock all components to prevent editing, or unlock them for modification.
Managing Complex Molds
When working with multi-part molds:
- Use Hide/Unhide to isolate specific sections
- Lock completed geometries to prevent accidental changes
- Name objects descriptively (can be renamed)
- Group related geometries logically